Fixture installation mistakes can cause leaks when parts do not fit, seals shift, or connections are tightened the wrong way. Check the fixture, its seals, and each visible joint before and after installation. Homeowners can handle simple checks, but hidden leaks or repeated problems need a plumber in Highland Village.
Table of Contents
- Which fixture installation mistakes most often cause leaks?
- How can you check compatibility before installing a fixture?
- What can go wrong when preparing water supply connections?
- How do faulty seals cause toilet and faucet leaks?
- Why do alignment and support matter during fixture installation?
- How should you test a newly installed fixture for leaks?
- When should you call a plumber about a leaking fixture?
- Frequently Asked Questions
Which fixture installation mistakes most often cause leaks?
The most common fixture installation mistakes include poor fit, damaged seals, loose or overtightened connections, and poor alignment. Any of these can let water escape around a joint or fixture. A slow drip may seem minor, but water can spread into cabinets, floors, walls, and other parts of a building.
How small installation errors become water damage
A connection may look secure even when its seal is pinched or shifted. Water may seep out only when a faucet runs or a toilet tank refills. This can make a leak hard to spot at first. Do not check only for a puddle right after the work. Look at the joints and nearby surfaces again during normal use.
Common warning signs include damp cabinet floors, water stains, loose fixture parts, and a musty smell. A toilet may rock or leave water around its base. A faucet may drip below the sink even when its handle and spout look dry. These clues may point to a bad seal, a loose supply line, or another plumbing issue.
Why fixture type and connection details matter
Toilets, faucets, sinks, and shower fixtures use different seals and fittings. A toilet seal sits between the toilet and the drain opening. Faucet parts may include washers, cartridges, or rings that keep water from escaping around moving parts. The wrong part, or a part in the wrong place, can cause a leak even with a new fixture.
A proper fit also depends on the fixture instructions and the plumbing already in place. Highland Village Plumbing can help property owners understand what may need to be checked. Toilet Repair may help with a toilet that keeps leaking after a careful check. Do not leave a fixture dripping if the problem does not stop.
How can you check compatibility before installing a fixture?
Check the fixture size, fitting type, and water supply connection before removing the old one. Compare these details with the maker’s instructions and the plumbing already in place. A fixture that does not match may need extra parts or changes. A rushed or improvised connection can leak later.
Matching dimensions, fittings, and supply connections
First, compare the new fixture with the old one. Check the mounting holes, the width of the base, and where the water connections meet. For a faucet, make sure the sink or counter openings fit its design. For a toilet, check that its base and drain connection line up with the floor opening.
Next, check the supply lines and fittings. A supply line is a tube that carries water from a shutoff valve to a fixture. Its ends must fit both sides securely. Do not assume a line will work just because it looks close. The thread type, shape, and length all matter. A line that bends sharply or pulls on a fitting can strain the joint.
Checking instructions and local requirements
Read the fixture instructions before starting the work. They show which parts go with the fixture and how they should fit. Keep the seals and hardware together. If a part is missing, the wrong size, or hard to understand, stop and check what you need. Do not force parts to fit.
Plumbing rules may vary by place and by the type of work. Replacing a fixture can be different from changing pipes or adding a new connection. Homeowners in Highland Village can check local rules before starting work that may need approval. If the job involves unfamiliar pipes, wall openings, or a different drain setup, ask a plumber for guidance. That can help keep a small task from turning into a larger repair.
What can go wrong when preparing water supply connections?
Leaks may start if the water is not fully shut off, threads are damaged, or the wrong sealant is used. Prepare each connection with care and follow the fixture maker’s directions. If a shutoff valve will not close or starts leaking, stop. Do not force it.
Shutting off and verifying the water supply
Before taking apart a supply line, close the shutoff valve for that fixture. Then open the faucet or flush the toilet to make sure the water has stopped. Keep a container and towel nearby to catch water left in the line or fixture. If water keeps flowing, the valve may not close fully.
A homeowner can check an easy-to-reach valve and wipe up small spills. The valve should turn without force. If it is stuck, rusty, or leaking around its stem, do not use tools to force it. This can damage the valve or pipe. Stop the work and ask a plumber to check it.
Avoiding damaged threads and unsuitable sealants
Threads help hold some fittings together, but they can be damaged if parts start at an angle. Start threaded parts gently and check that they turn smoothly. If they bind or sit crooked, back them off and check the fit. Forcing them can harm the fitting and make a good seal harder to get.
Not every connection uses the same sealant. Some fittings seal with a washer or ring, so extra tape or paste may not belong there. Other threaded joints may need a sealant made for that use. Follow the fixture and fitting instructions. Tighten parts only as directed. Too much force can crush a washer, crack a fitting, or strain a pipe.
How do faulty seals cause toilet and faucet leaks?
A seal keeps water from passing through a joint that should stay closed. If the seal is missing, worn, dirty, or out of place, water can escape during normal use. Toilets and faucets use different seals, so choose the right part and place it as directed.
Installing toilet seals and mounting hardware correctly
A toilet seal joins the toilet outlet to the drain opening in the floor. If the toilet is set down off-center, the seal may shift or fail to close the gap. A toilet that rocks can put extra strain on the seal. Keep the toilet steady and lined up as you fit it. Follow the maker’s steps for the mounting hardware.
Do not use loose bolts to pull a badly placed toilet into position. This can put uneven pressure on the base and may crack the fixture. The floor should be firm, and the toilet should sit level without rocking. If the base moves, water appears around it, or an odor remains, a plumber may need to check the seal or drain connection.
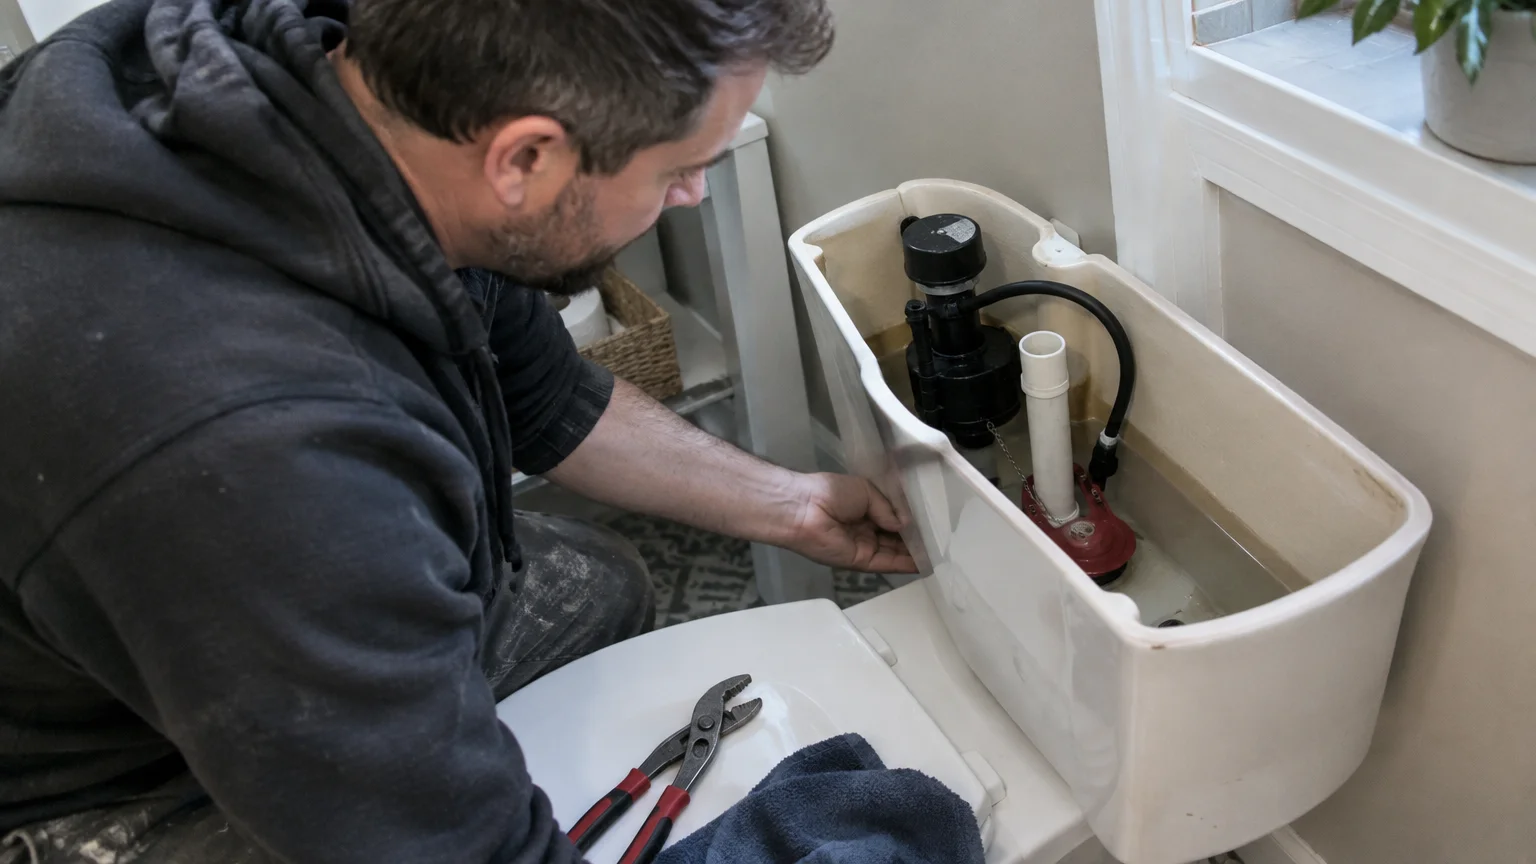
A toilet that keeps running may have a problem inside its tank. A worn flapper or a float set in the wrong place can be the cause. A flapper is the rubber part that opens to let tank water into the bowl. A homeowner can look inside the tank and see if a part looks out of place. If a simple change does not stop the water, Toilet Repair may help find the cause.
Positioning faucet washers, cartridges, and rings
Faucet seals can wear or shift around moving parts and water connections. A washer is a small part that helps close a joint. A cartridge controls water flow in many faucets. If either part is the wrong type or sits poorly, the faucet may drip from its spout or leak below the sink.
Before fitting a new part, compare it with the old one and read the faucet instructions. Keep the parts clean, and do not twist a seal as you put it in place. Once the faucet is back together, open the water slowly. Check the base, handles, and supply lines. If the leak returns after a part change, there may be another cause, such as a damaged fitting or worn faucet body.
Why do alignment and support matter during fixture installation?
Correct alignment lets water move through the fixture and drain without pulling on joints. Good support keeps the fixture steady during daily use. If a toilet, faucet, or drain is forced into place, its connections can shift, weaken, or leak over time.
Keeping toilets, faucets, and drains aligned
A toilet should sit squarely over its drain opening, with its base steady on the floor. A sink drain should meet the plumbing without a sharp bend or sideways pull. A faucet should sit flat against the sink or counter, with its seals in the right place. Check the fit before tightening the hardware so the parts are not held at an angle.
Water lines need a natural path, too. A line that is stretched, crushed, or sharply bent can strain its ends. Keep it away from sharp edges and moving parts. If the old pipes do not line up with the new fixture, do not force them together. A plumber may need to make a proper change.
Securing fixtures without stressing pipes
Mounting hardware should hold the fixture in place without crushing it. Tighten parts in the order and way the maker explains. Hold a faucet steady as you secure its mounting parts. For a toilet, check that it does not rock before you finish. A fixture that shifts during use can put pressure on nearby seals.
Support matters under sinks and behind walls, too. Pipes should not hold up a fixture or be pulled to keep it in place. A homeowner can check visible parts for movement and signs of strain. If a pipe moves with the fixture, or a connection is hidden in a wall, a plumber can check the support and help limit hidden water damage.
How should you test a newly installed fixture for leaks?
Test the fixture with water running and check each visible joint, seal, and nearby surface. Look again after using it more than once, since some leaks appear only when a toilet refills or a drain carries water. Dry surfaces make new drips easier to see.
Checking supply lines and joints under normal water pressure
After installation, open the shutoff valve slowly. Watch the supply line, valve, and fixture connection as water flows. Use a dry cloth or paper towel to check around the joints. A damp mark can reveal a small leak that is hard to see. Do not stop checking just because the joint seems dry at first.
If a connection drips, close the valve and inspect the fitting only if it is safe and easy to reach. Do not keep tightening a joint without knowing why it leaks. More force will not fix a damaged washer or the wrong fitting. If the valve itself leaks or the water cannot be shut off, stop and call a plumber.
Testing drains, flushes, and repeated use
Run a faucet and check the water lines and drain below the sink. Fill the basin partway, then let the water drain while you watch the trap and joints. A trap is the curved pipe under many sinks. It holds water and helps keep sewer gas out of the room. Check that water drains well and that no joint drips.
For a toilet, flush more than once and watch the tank refill. Check around the base and supply line, then look again after the floor dries. Homeowners can do these checks without taking pipes apart. Keep watching for damp spots during normal use. If a leak returns, note where it appears and when it happens. Slow drains or clogs may point to a drain issue, not a fixture seal.
When should you call a plumber about a leaking fixture?
Call a plumber when a leak is hidden, keeps coming back, or damages floors, walls, cabinets, or ceilings. Professional help is also the safer choice when a valve will not shut off or a connection is damaged. Homeowners can handle simple visual checks and cleaning. Repairs involving pipes they do not understand are best left to a plumber.
Recognizing hidden leaks and recurring failures
A leak may travel away from its source before it becomes visible. Stains, peeling paint, soft floors, damp cabinet panels, or a lasting musty smell may point to water behind a surface. Shut off the fixture supply if it is safe. If water is spreading or you cannot find the source, contact a plumber promptly. A serious leak may need emergency plumbing help.
Leaks that return are another reason to get help. A new washer or seal should not fail again right away. The cause may be poor alignment, a damaged fitting, pressure on a pipe, or a problem inside a wall or floor. Highland Village Plumbing can help property owners understand fixture symptoms and decide what needs a closer look. The same care matters in homes and business properties across Highland Village.
Low water pressure may seem like a fixture problem, but it can have other causes. Check whether one fixture or several have weak flow. A blocked aerator, the small screen at a faucet tip, may be cleaned by a homeowner. If pressure drops across the property or changes suddenly, a plumber can check the wider plumbing system.
Preparing useful details about the problem
Before a service visit, note where water appears and when it starts. Tell the plumber if the fixture was just installed, what checks you have done, and whether the leak changes when water runs or a toilet flushes. Clear space around the fixture to help the check go smoothly.
Do not take apart parts you do not know. Keep the area dry if you can, and move items away from the leak. If the fixture valve works and the leak is limited to that fixture, shutting it off may help limit water loss. If the valve is stuck or the leak is widespread, leave it alone and ask for help.
Key takeaways:
- Check fit, seals, alignment, and instructions before installing a fixture.
- Do not force a fitting that does not match or a stuck shutoff valve.
- Test supply lines, drains, and fixtures during normal use.
- Call a plumber for hidden, repeated, or damaging leaks.
Conclusion
Careful fitting and simple leak checks can prevent many fixture problems. Homeowners can inspect visible connections, clean a faucet aerator, and watch for damp spots. Stop if a valve, pipe, or hidden connection is uncertain. Contact us to have a leaking fixture checked by Highland Village Plumbing.
Frequently Asked Questions
What causes a toilet to keep running?
A toilet often keeps running because its flapper does not seal, its float is out of place, or a tank part is worn. A homeowner can look inside the tank and check for a stuck or damaged part. If a simple adjustment does not help, a plumber can find the cause.
Can a homeowner fix a dripping faucet?
A homeowner may be able to clean a blocked faucet aerator or replace a matching washer by following the faucet instructions. First, shut off the fixture’s water and make sure it has stopped. If the valve is stuck, the leak is below the sink, or the drip returns, call a plumber.
How can someone tell whether a fixture leak is hidden?
Look for damp cabinet floors, stains, soft surfaces, peeling paint, or a musty smell near the fixture. A leak may travel before it appears, so the wet spot may not be where the leak starts. If you see damage or cannot find the source, stop using the fixture and arrange a plumbing check.
Should thread tape be used on every plumbing connection?
No. Some connections seal with a washer or ring and do not need thread tape. Other threaded joints may need a suitable sealant. Follow the fixture and fitting instructions. Tape where it does not belong can stop parts from fitting well and may lead to a leak.
What should be checked after installing a new faucet?
Run water and check the supply lines, faucet base, handles, and drain connections. Then fill the sink partway and let it drain while you look beneath the basin. Wipe the joints dry and check them again during normal use. If water returns, stop using the faucet and have the connection checked.
If you are not sure what you are dealing with, it is worth having someone look at it before it turns into a bigger job. Get in touch with Highland Village Plumbing today and we will tell you where you stand.